

Abrasive blasting is a tough, gritty job. However, much of the testing, evaluation, and review of sandblasting equipment is performed in a very controlled environment. Any long-time abrasive blaster will tell you that a blasting job site with real-life conditions is the ideal testing ground for new blasting equipment, particularly blasting hoods.
To conduct a thorough and realistic field evaluation test for an abrasive blasting helmet, use the following template and tips below.
Blast Helmet Field Test Tips and Best Practices
- Conduct any field test with your actual blasters
These are the people who will be using this equipment, and they understand best which features help them perform their job most easily and efficiently. - Bring a current helmet
For any field test, compare the current blasting helmet against any other helmets you are evaluating. - Test at an actual job site under real blasting conditions
Trying on a blasting helmet in a conference room, break room, or showroom does not adequately show how the helmet fits or feels under the heat, grit, and movement patterns of a blaster at work. Pay attention to conditions inside the helmet after using for a shift (like sweaty padding), and imagine that after one month or one year of use. You may even want to test the helmet under various scenarios, such as sandblasting, bead blasting, shot blasting or soda blasting. - Document as you go
Even though it’s tempting, don’t wait until you’re back at the office to document the users’ feedback of the test. Write down the testers’ feedback at each step in the process. Use a separate form for each field tester.
Items Needed:
- Current blasting helmet
- Test helmet(s)
- Accessories and attachments for test helmet (cooling tube, breathing tube, cape, etc.)
- Active abrasive blasting job-site
- Experienced blaster(s)
- Printed copy of field test form(s)
- Pen or pencil
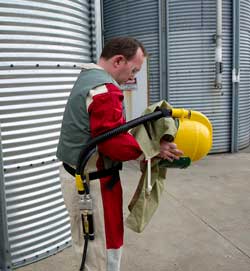
Step 1. The Hold Test
Hold the test helmet in one hand and current helmet in the other.
Do you feel a difference in the weight of the helmets?
__________________________________________________________________________________
Which helmet feels lighter?
__________________________________________________________________________________
Need to Know: Lighter weight helmets mean less neck strain at the end of a full shift.
Step 2. The Balance Test
Attach the appropriate cooling device for the helmet(s) being tested. Then adjust any inserts or cheek pads to determine the appropriate fit.
Need to Know: Removable inserts will allow for easier sanitizing.
Evaluate the stability of the helmet. How stable does the helmet feel on your head with each of the following movements?
Bending forward:
__________________________________________________________________________________
Squatting down:
__________________________________________________________________________________
Turning head to look over right/left shoulder:
__________________________________________________________________________________
Step 3. The Fit & Function Test
Use the helmet while blasting an actual job. Check for the following aspects regarding fit and function. Does it perform differently with different types of media blasting?
How cool is the air inside the helmet?
__________________________________________________________________________________
How does the airflow compare to your current helmet?
__________________________________________________________________________________
Is anything impairing the flow of air to your head or face?
__________________________________________________________________________________
How well did the breathing tube and helmet move with you as you worked?
__________________________________________________________________________________
Step 4. The Wear & Tear Test
Getting peace of mind about the durability of a blasting helmet includes not only the design features, but also the support of the helmet manufacturer. To help understand the toughness and long-lasting qualities of the helmet, note the following:
Length of Manufacturer’s Warranty:
__________________________________________________________________________________
Items Covered under Warranty:
__________________________________________________________________________________
What design features prevent wear and tear in vulnerable areas?
- Breathing tube connection
- Cape attachment area/latch guard
- Field replaceable parts
- Other: _____________________________________________________________________
- Other: _____________________________________________________________________
Step 5. The Overall Feedback
How would you describe the overall comfort level of the helmet?
__________________________________________________________________________________
__________________________________________________________________________________
How would you rate the level of airflow during use?
__________________________________________________________________________________
__________________________________________________________________________________
What do you like best about the test helmet?
__________________________________________________________________________________
__________________________________________________________________________________